With MalBlock DNS Security you can create a daily and weekly schedule to restrict access to content.
Complete the following steps to set up a Content Restriction schedule for user groups.
Scheduling Content Restrictions With MalBlock DNS Security
Share or Print This Article
Solution
1
Log in to MalBlock DNS Security, see Logging in to MalBlock DNS Security.
2
From the MalBlock dashboard, click the Settings tab and select Protection Preferences. 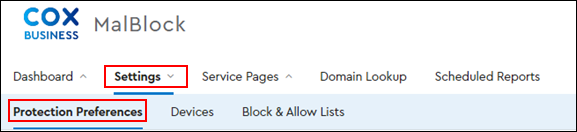
3
On the left-hand side, under Groups, select the group you want to allow access to content during set hours.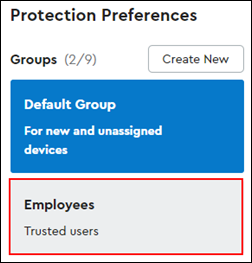
4
Scroll down to the Content Restriction Schedule and click the OFF toggle button to turn it on.
Result: The Create Rule calendar displays.
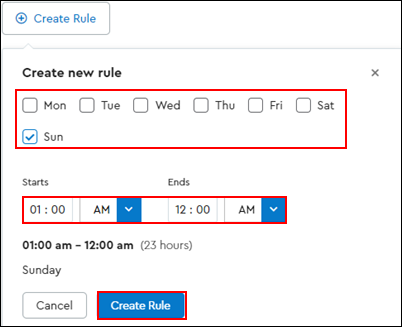
5
To create a new rule, click the + Create Rule button.
6
From the Create Rule pop-up window, complete the following steps.
- Click the box to select the days of the week.
- Enter the Starts and Ends time, click the arrow on the drop-down to select AM or PM.
- Click Create Rule.
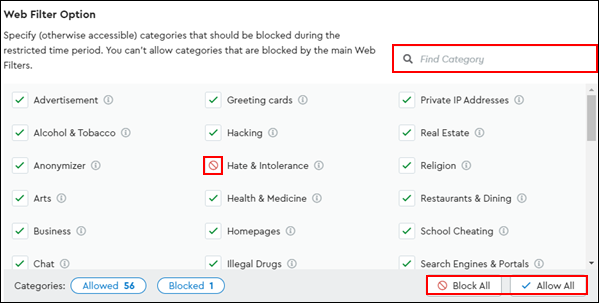
7
From the Web Filter Option section you have the option to allow or block categories during the restricted time period by completing the following steps.
- Locate a category by either of the following methods.
- In the Find Category search field, enter a specific category to turn a protection category on or off, or
- scroll through the full list of categories.
- Next to the category, click the green checkmark to disable or the red circle to enable the category.
- There is also the option to click Block All or Allow All for all of the categories on the list.
8
To save the Content Restrictions, scroll down to the bottom of the window and in the right-hand corner, click Save.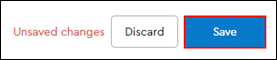
9
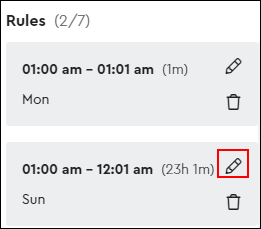
Follow the steps below to edit an existing rule.
- On the right-hand side of the calendar section, from the Rules column, locate the rule you want to edit and click the pencil icon.
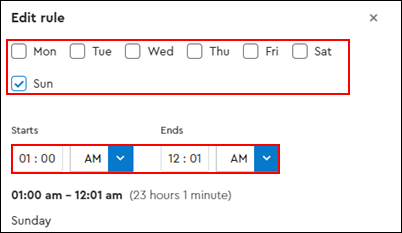
- From the Edit rule pop-up window, complete the following edits.
- Click the boxes to check or uncheck the days of the week.
- Change the Starts and Ends time.
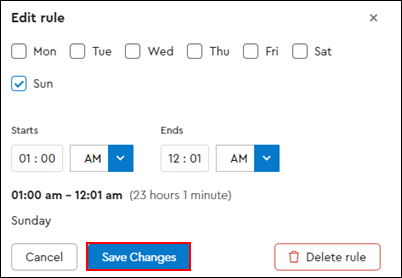
- Click Save changes.
10
To delete an existing rule, click the trash can icon in the rule box, then scroll down and click Save.

Cox Business MyAccount Updates
Cox Business MyAccount Updates
With the new and improved MyAccount portal from Cox Business, you’re in control. Included with your Cox Business services, it’s all right at your fingertips anytime, anywhere.
- Perform a health check on your services and reset your equipment
- Easily configure key features and settings like voicemail and call forwarding
- View your balance and schedule payments
Search Cox Business Support
Search Cox Business Support
Didn't Find What You Were Looking For? Search Here.