Follow the steps below to enable your iOS device to send and receive Cox Business Email using IMAP or POP settings.
Note: For the steps to change the email server settings on your iOS device, see Changing Email Server Settings for Mail on iOS.
Configuring Cox Business Email on Your iOS Device
Solution
Cox does not provide support for these devices. The following information is for reference only. For additional information, visit Apple Support or contact your wireless provider.
From the Home screen, tap Settings.
From the Settings screen, scroll down and tap Mail.
From the Mail screen, tap Accounts.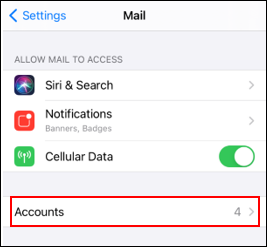
From the Accounts screen, tap Add Account.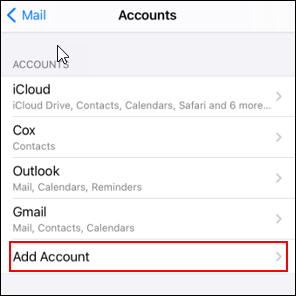
From the Add Account screen, tap Other.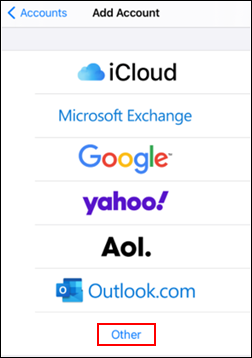
From the Add Account screen, complete the following steps.
- Tap Add Mail Account.
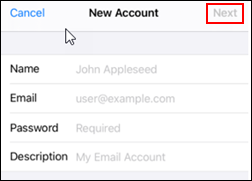
- From the New Account screen, enter your information in the following fields.
- Name - Your full name as you want it displayed
- Password
- Description - This will display in your Accounts list in the Settings
- Scroll to the top right-hand side of the screen, tap Next.
From the New Account screen, complete the following steps.
- Select either the Internet Mail Access Protocol (IMAP) or Post Office Protocol (POP) tab.
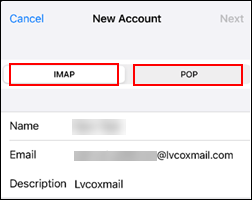
For further information, the table below outlines the differences between IMAP and POP.
Server Type Benefits IMAP - IMAP allows you to access your email wherever you are, from any device.
- When you read your email using IMAP, you aren't actually downloading or storing it on your computer.
- You can check your email from different devices, anywhere in the world: your phone, computer, or a friend's computer.
POP - POP works by contacting your email service and downloading all of your new messages from it.
- Once they are downloaded onto your PC or Mac, they are deleted from the email service.
- This means that after the email is downloaded it can only be accessed using the same computer.
- If you try to access your email from a different device, the messages that have been previously downloaded won't be available to you.
- From the IMAP or POP tab, enter the following information in the INCOMING MAIL SERVER and OUTGOING MAIL SERVER fields.
Server Type Details Incoming Mail Enter your information in the following fields.
- Host Name - choose one of the following:
- IMAP - imap.coxmail.com, or
- POP – pop.coxmail.com
- User Name - Enter your email address.
- Password - Defaults to the previously-entered password. If not, re-enter password
Outgoing Mail Host Name – Enter smtp.coxmail.com - Host Name - choose one of the following:
- Tap Next.
From the IMAP or POP screen, tap Save.
Cox Business MyAccount Updates
Cox Business MyAccount Updates
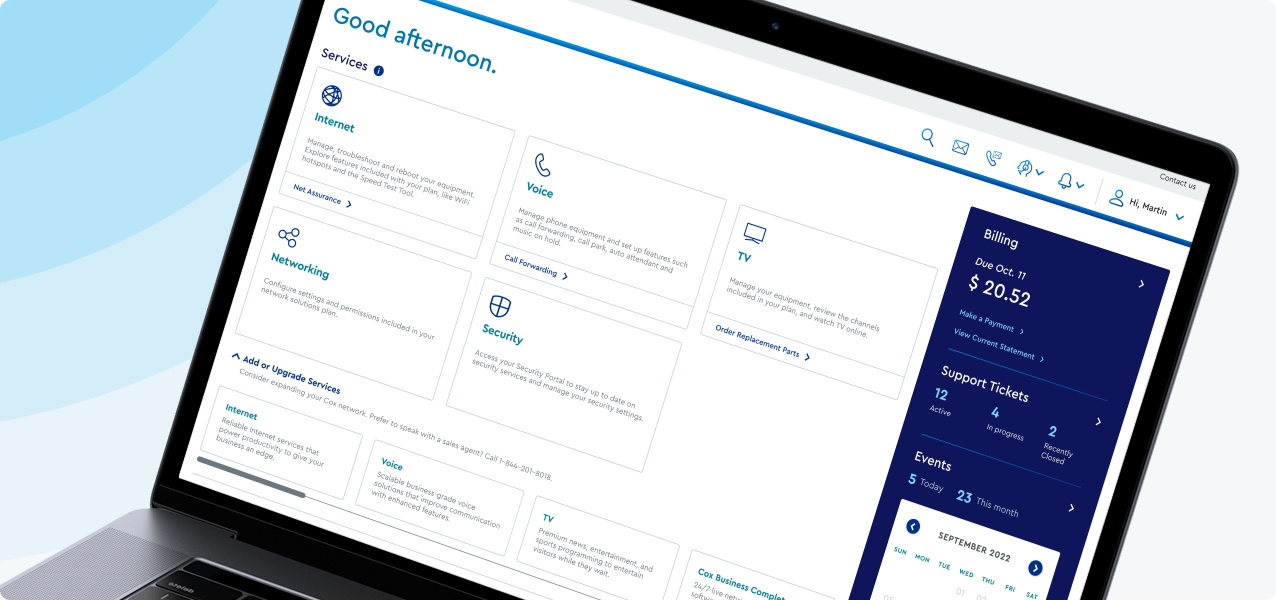
With the new and improved MyAccount portal from Cox Business, you’re in control. Included with your Cox Business services, it’s all right at your fingertips anytime, anywhere.
- Perform a health check on your services and reset your equipment
- Easily configure key features and settings like voicemail and call forwarding
- View your balance and schedule payments
Search Cox Business Support
Search Cox Business Support
Didn't Find What You Were Looking For? Search Here.