Use the following steps to edit or delete an existing regular or holiday time schedule.
Editing or Deleting a Time Schedule Online
Solution
Go to myaccount-business.cox.com, enter your User ID and Password, and then click Sign In.
Note: If you have not created an online profile with a User ID and Password, refer to Setting Up Your Online Profile.
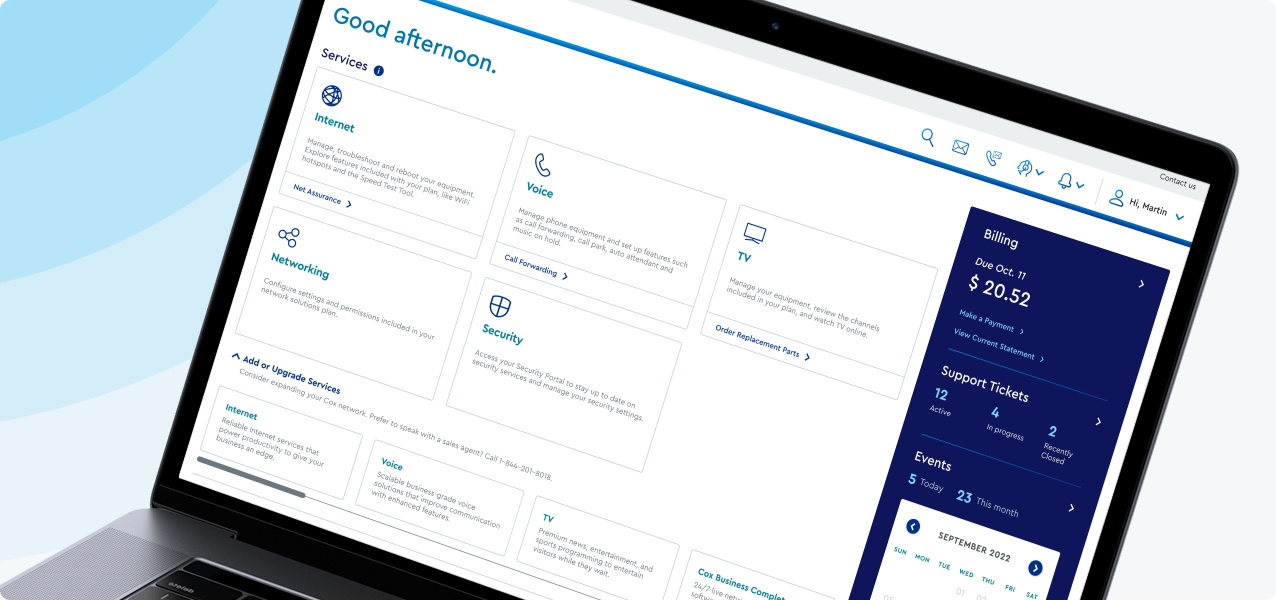
From the Services section, click the Voice icon.
![]()
Do you have more than one account?
- If no, then continue to the next step.
- If yes, then from the Select an account drop-down menu, select the account to modify.

- If yes, then continue to the next step.
- If no, then proceed to step 6 for changing your settings.
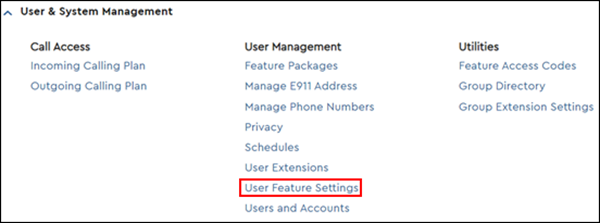
Click the arrow to expand the User & System Management section and complete the following.
- Click User Feature Settings.

- Locate the number you are modifying and click Edit.

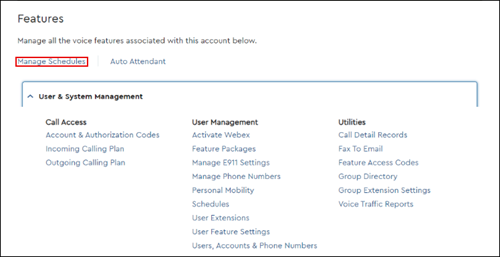
From the Business Voice page, click the Manage Schedule link.

Refer to the following table for instructions based on what you are modifying.
| If... | Then... | ||
|---|---|---|---|
| Editing the name of an existing schedule | Complete the following steps.
| ||
| Editing an event within an existing schedule | Complete the following steps.
| ||
| Deleting an event within an existing schedule | Complete the following steps.
| ||
| Adding an event to an existing schedule | Complete the following steps.
| ||
| Deleting an existing schedule | Complete the following steps.
|
From the Recurs drop-down menu, select the frequency and complete the appropriate steps below.
| If the frequency selected is... | Then... |
|---|---|
| Never | Continue to the next step. |
| Daily | Complete the following steps.
|
| Weekly | Complete the following steps.
|
| Monthly | Complete the following steps.
|
| Yearly | Complete the following steps.
|
Do you want to create another event?
- If no, then click Save to finalize all changes.
- If yes, then complete the following steps.
- Click Save & Add Another.
- Repeat the process for adding a new event to an existing schedule in step 7.

Cox Business MyAccount Updates
Cox Business MyAccount Updates
With the new and improved MyAccount portal from Cox Business, you’re in control. Included with your Cox Business services, it’s all right at your fingertips anytime, anywhere.
- Perform a health check on your services and reset your equipment
- Easily configure key features and settings like voicemail and call forwarding
- View your balance and schedule payments
Search Cox Business Support
Search Cox Business Support
Didn't Find What You Were Looking For? Search Here.