Follow the steps below to create a thermostat schedule.
Setting a Thermostat Schedule in Your Security Solutions Subscriber Portal
Share or Print This Article
Solution
1
Go to myaccount-business.cox.com, enter your User ID and Password, and then click Sign In.
Note: If you have not created an online profile with a User ID and Password, refer to Setting Up Your Online Profile.
2
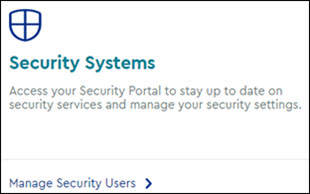
From the Services section, click the Security Systems icon.
3
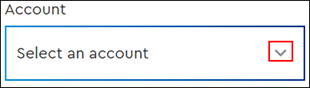
Do you have more than one account?
- If no, then continue to the next step.
- If yes, then from the Select an account drop-down menu, select the account to modify.
4
Click the Launch portal button to access the Security Solutions subscriber portal.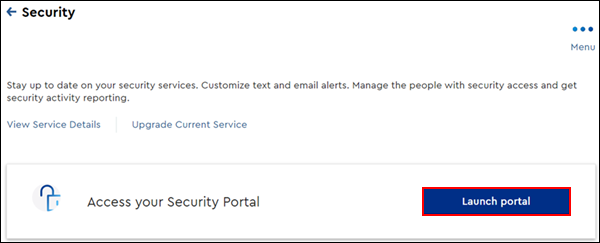
5
On the subscriber portal home page, on the thermostat tile, click the arrow to access the Thermostats page.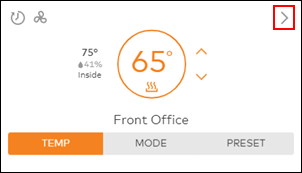
6
On the top menu of the Thermostats page, click Schedules.
7
Click to select Heat or Cool temperature modes for the thermostat.
8
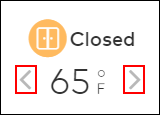
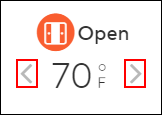
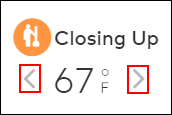
Complete the following steps for the three temperature settings.
- For the Closed setting, click the left and right arrows to set the temperature for closed operation hours.
- For the Open setting, click the left and right arrows to set the temperature for open operation hours.
- For the Closing Up setting, click the left and right arrows to set the temperature during operation closing procedures.
9
Under the View section, select one of the following.
- 5 & 2-Day: Set and view the temperature schedule for Weekday and Weekend times.
- 7-Day: Set and view the temperature schedule for Sunday through Saturday.
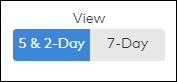
Note: The example shown below is for the 5 & 2-Day View.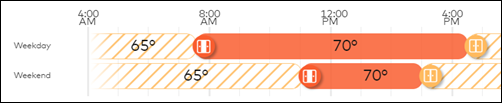
10
Complete the following steps to assign a trigger status to each of the temperature slide bar icons.
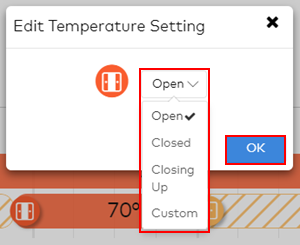
- On the temperature slide bars, click the desired icon to assign an Open, Closed, Closing Up, or Custom trigger status.
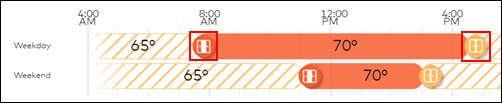
- In the Edit Temperature Setting pop-up, select either Open, Closed, Closing Up, or Custom, then click OK.
- Click and drag the selected temperature bar icons to the desired schedule times.
11
Reference the table below for a description and operation on the additional settings for the temperature schedule.
| Setting | Operation |
|---|---|
Settings Per Day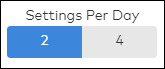 | Click to select one of the following settings.
|
Fan Schedule | Click to select day and time periods to turn the fan on |
Smart Away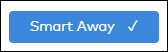 | The Smart Away feature may be used to automatically set the thermostat to your Closed temperature when the system detects that the business is closed. The thermostat schedule will resume when the security system is disarmed or any of the enabled Geo devices are detected. |
Copy Schedule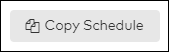 | Click Copy Schedule to select a daily schedule to repeat throughout selected days of the week. |
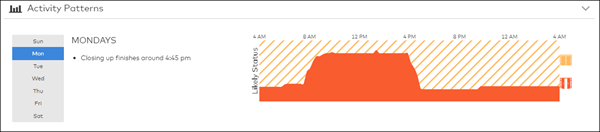 | Activity Patterns displays trends based on your business being open or closed. The Likely Status data may assist you with setting your temperature schedule efficiently.
|
12
Click Save, to update your thermostat schedule.

Cox Business MyAccount Updates
Cox Business MyAccount Updates
With the new and improved MyAccount portal from Cox Business, you’re in control. Included with your Cox Business services, it’s all right at your fingertips anytime, anywhere.
- Perform a health check on your services and reset your equipment
- Easily configure key features and settings like voicemail and call forwarding
- View your balance and schedule payments
Search Cox Business Support
Search Cox Business Support
Didn't Find What You Were Looking For? Search Here.